Page 1 of 1
(OAK- Detail Textures) new map creation
Posted: Fri Aug 28, 2015 11:22 pm
by BambooStew22
My old computer melted and I lost everything!!!

I am back and would like to resurrect "ONE DREAM"
I am in desperate need of the knowledge of how to add the beautiful "DETAIL TEXTURES" to my custom color maps????? PLEASE HELP
like I said I lost everything in a computer melt down and am busting ass to recoop assets and strive to create the most beautiful MYTH II maps of all time.
PLEASE I need to know how to add detail textures to custom color maps!!!
any help is greatly appreciated
Re: (OAK- Detail Textures) new map creation
Posted: Sat Aug 29, 2015 3:27 am
by paladin MAIK
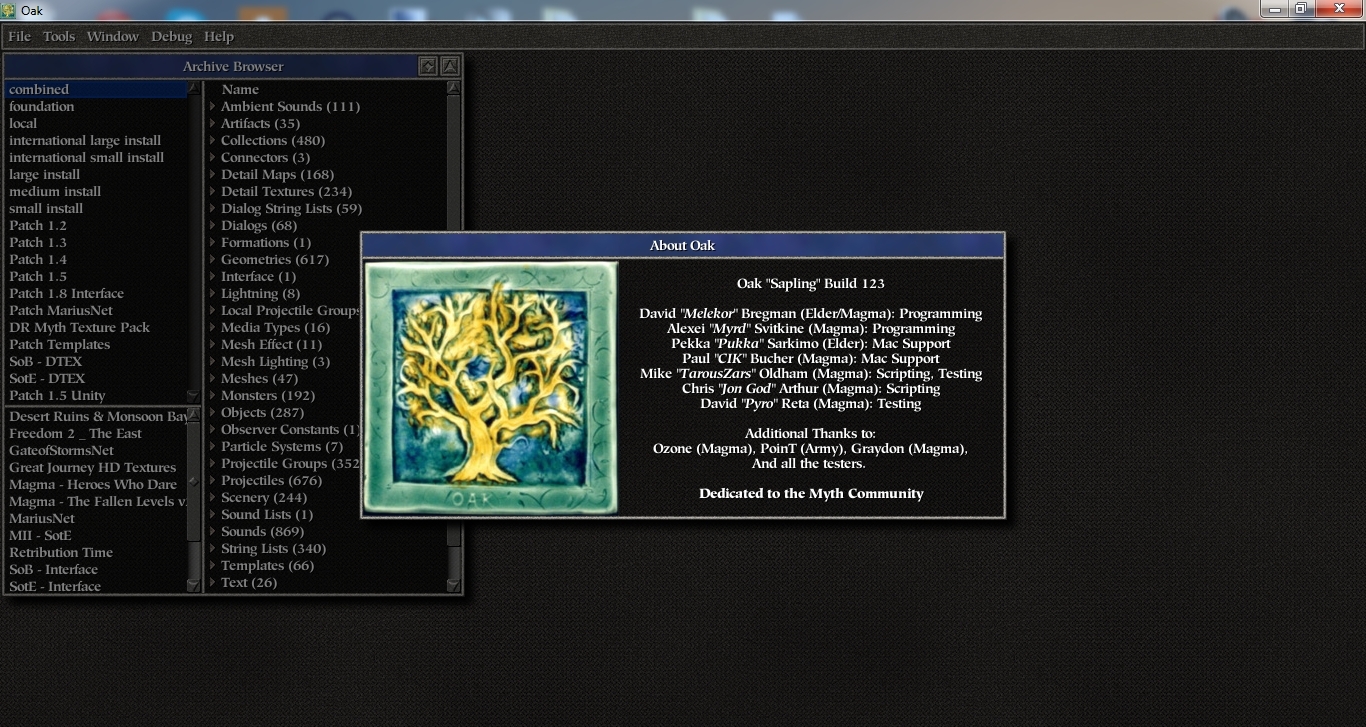
1. Open Project Magma's "OAK"
Picture #1 Open Oak
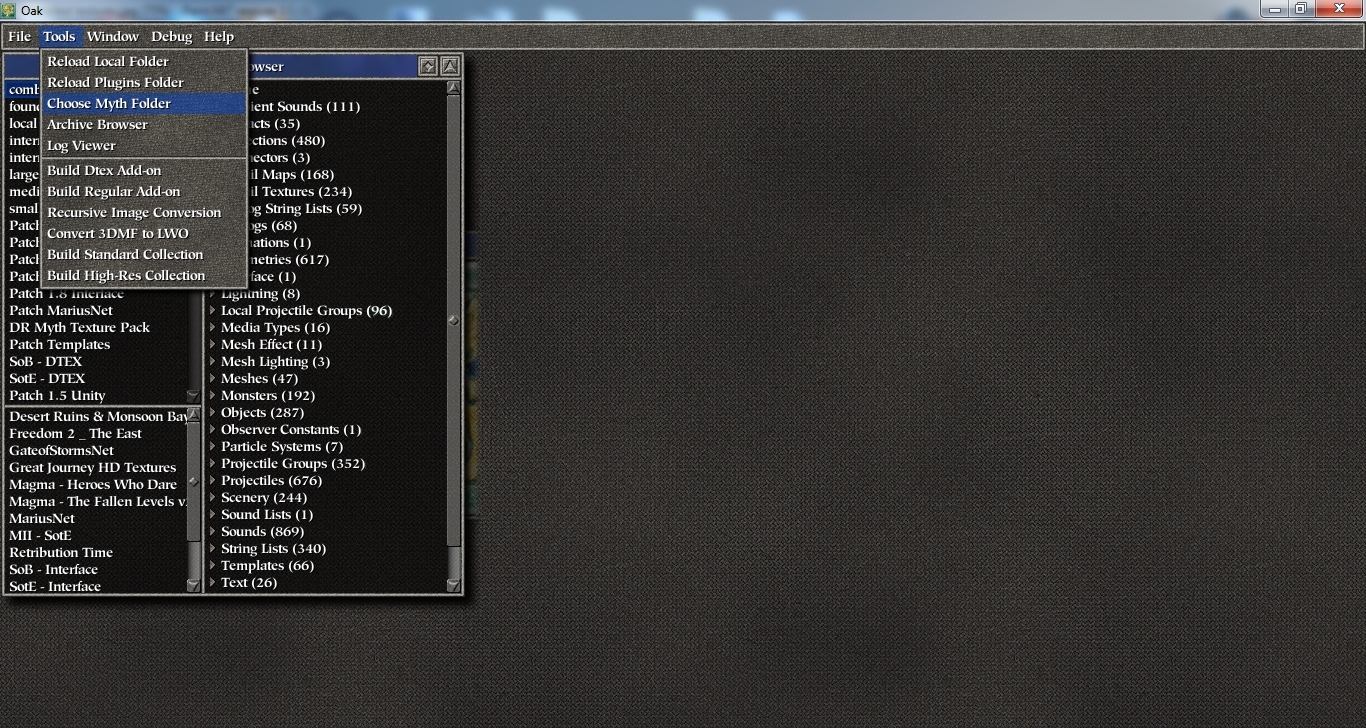
2. Tools/Choose Myth Folder
Picture #2 Choose Myth Folder
3. You can use Jon God's Detail Textures MegaPack or another Detail Textures (I use at this moment, DarthRevan's Hi-Res Textures). Recomended Click on the Detail Textures add-on "Default Working Set".
Picture #3 Detail Textures
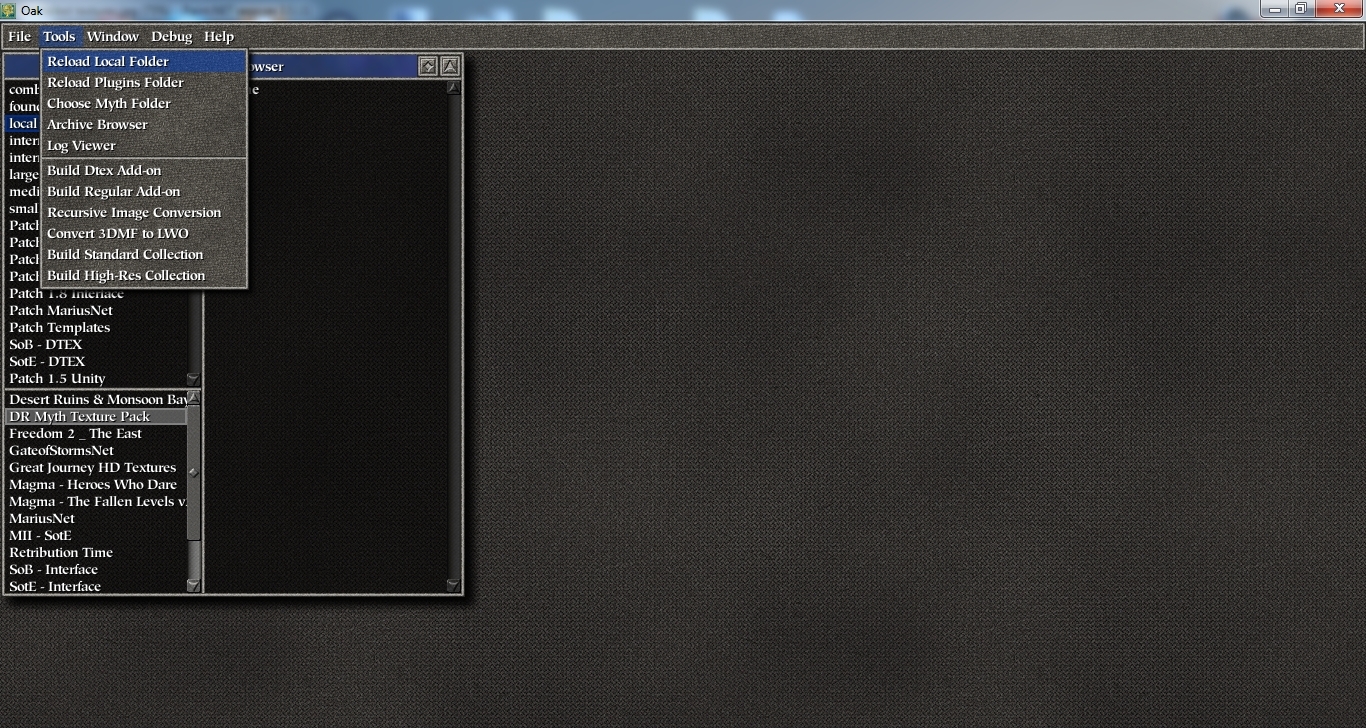
4. If You see - nothing in your "local" folder, click tools/reload local folder.
Picture #4 Reload local folder
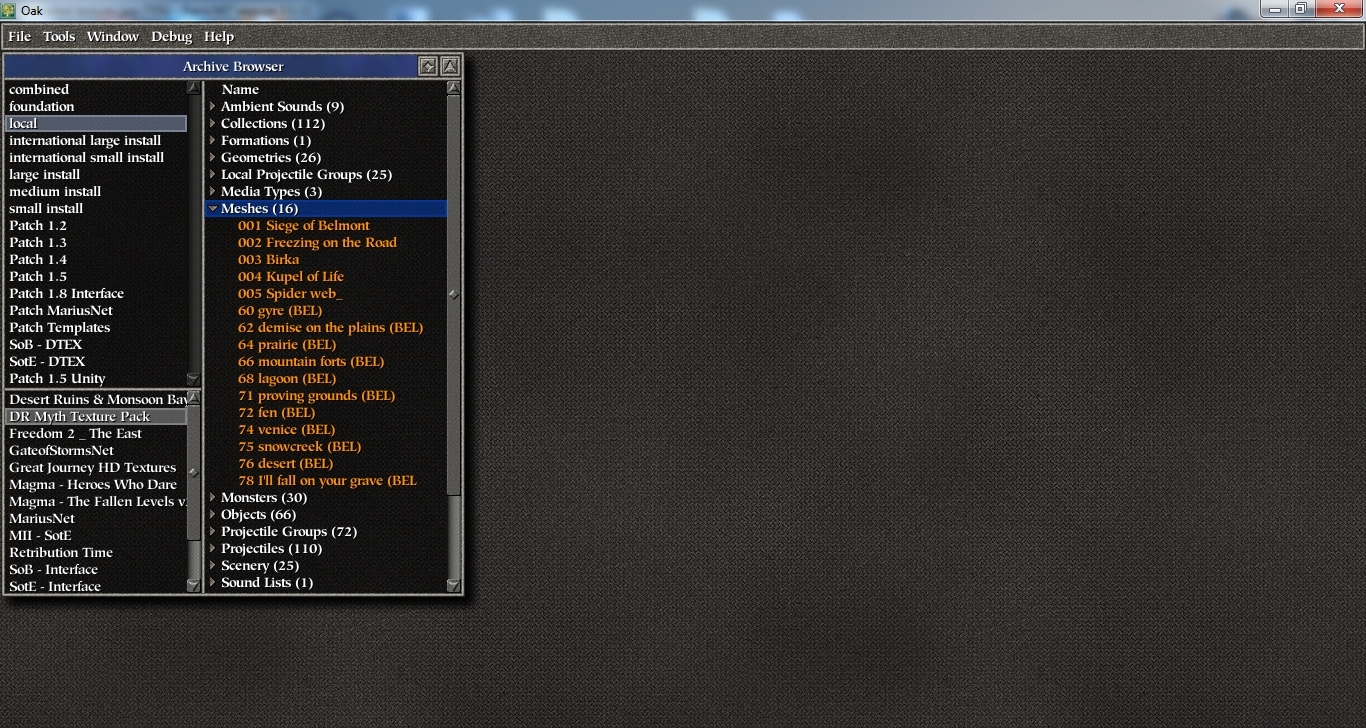
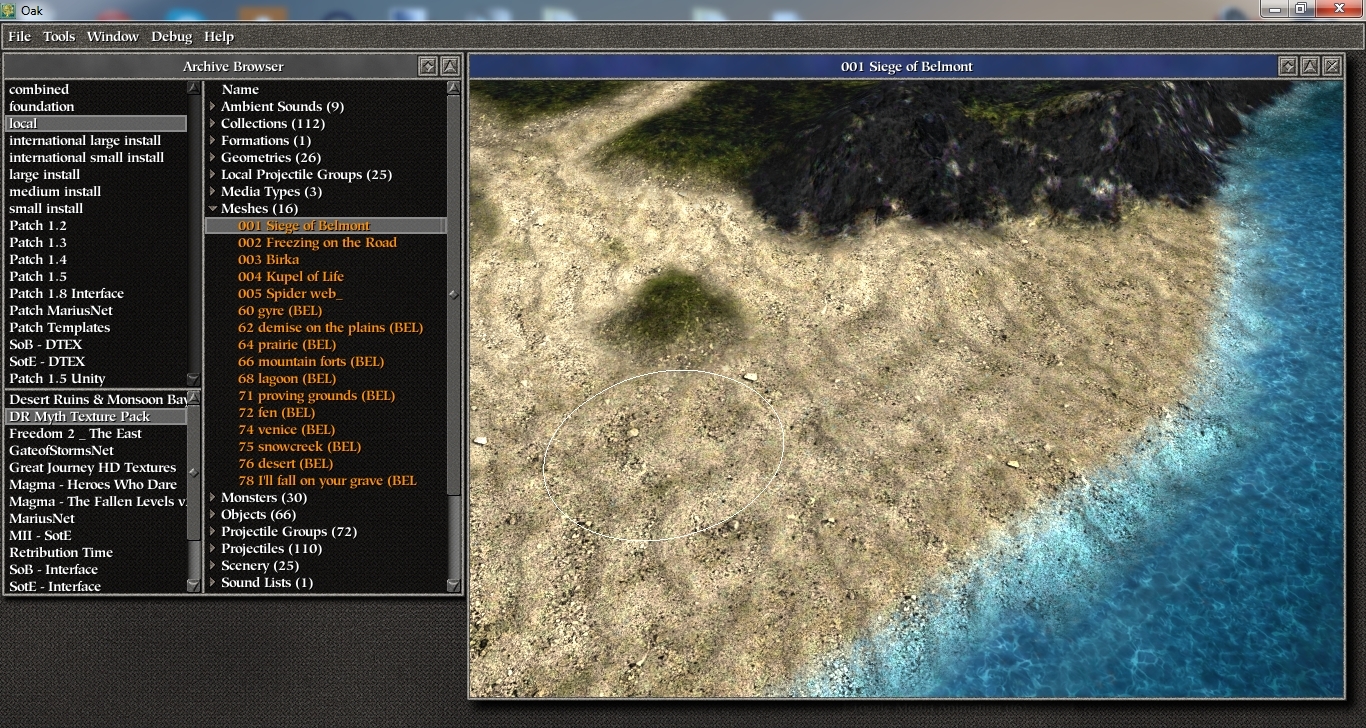
5. Click on the "local" table and select "meshes" (mesh what you want to Detailed).
Picture #5 Meshes select
6. As you can see, we are open mesh window. You can pan and rotate the camera, zoom out and zoom in. You can explore your mesh.
Picture #6 Mesh Window
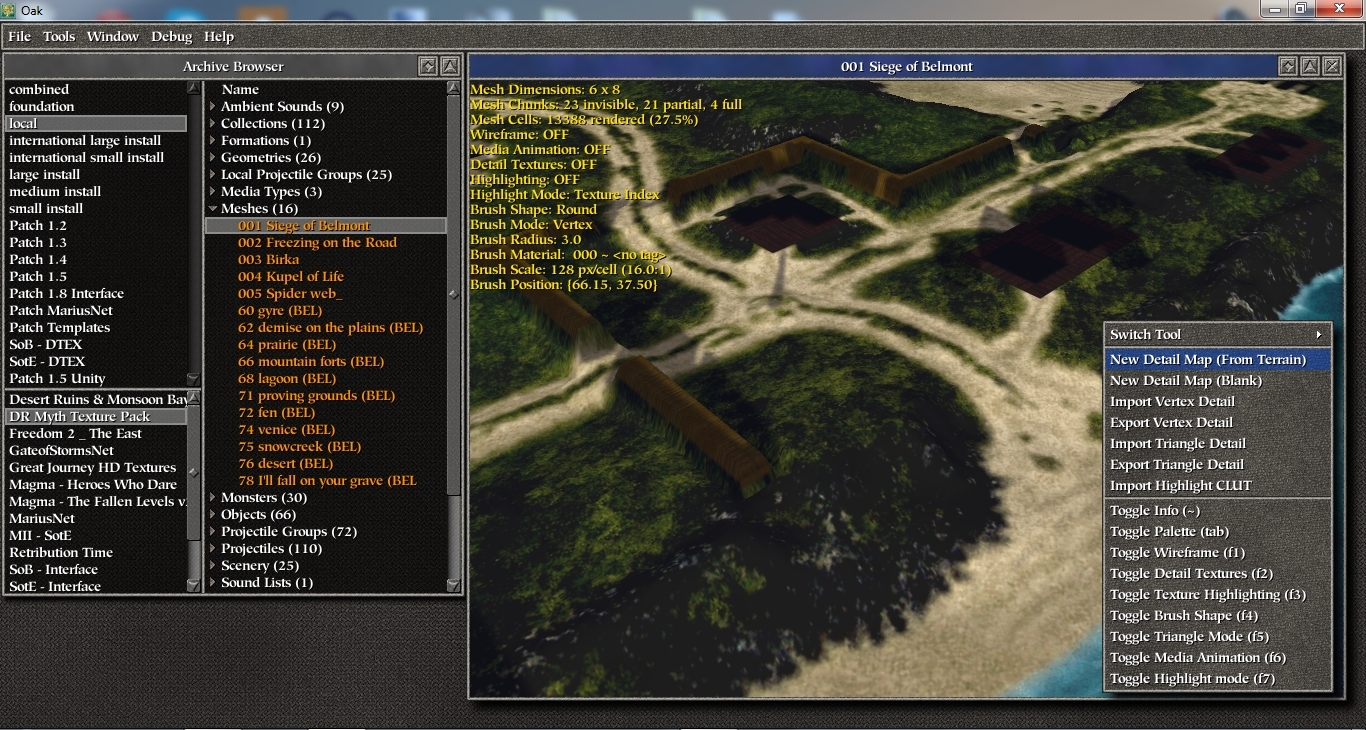
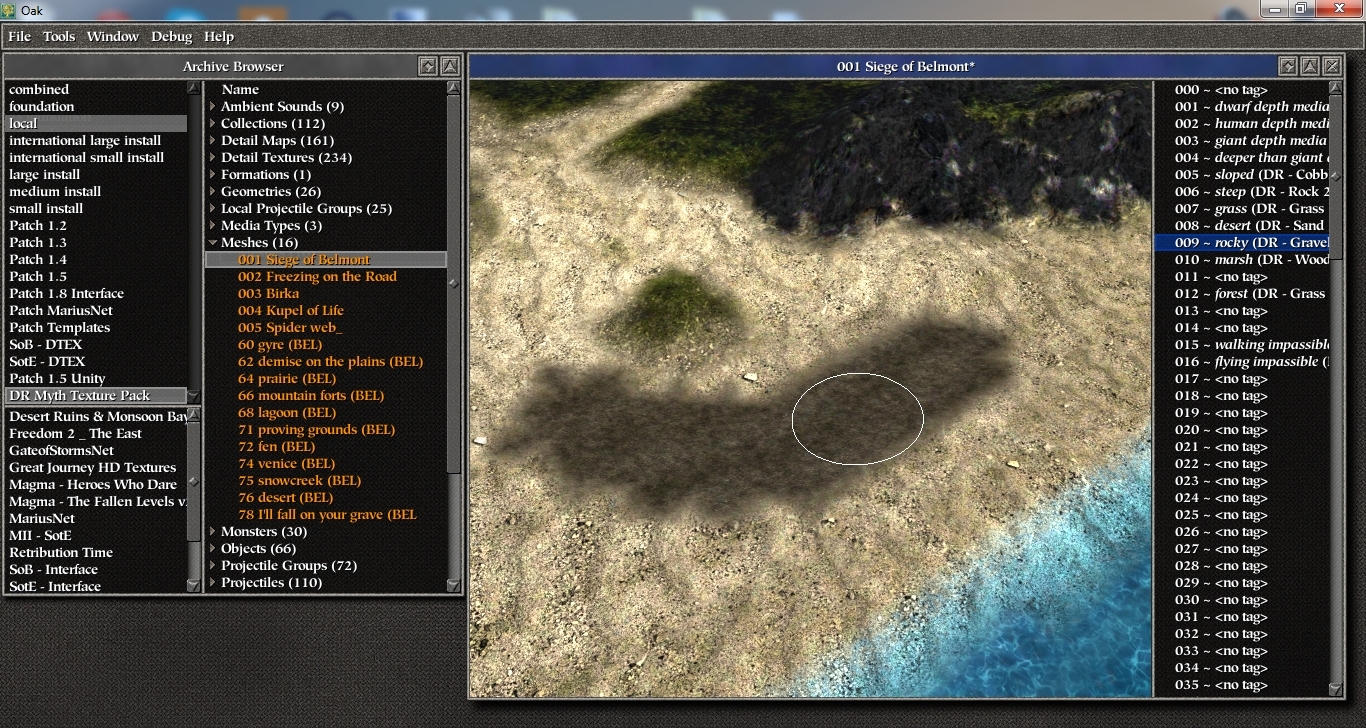
7. Click RightMoseButton on the mesh window and you open DTEX Options. Select "New Detail Map (From Terrain)
Picture #7 DTEX Options
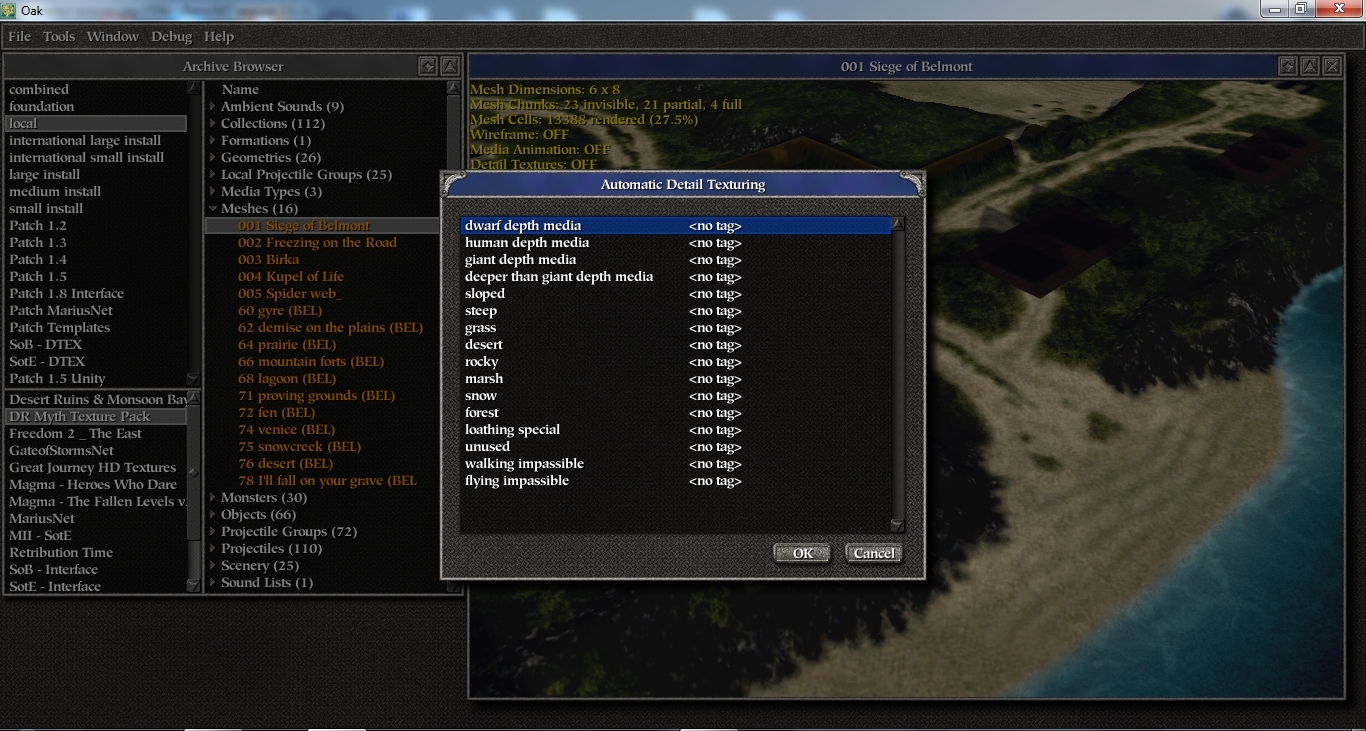
8. Now You can select terrain type for DTEX.
Picture #8 Terrain type
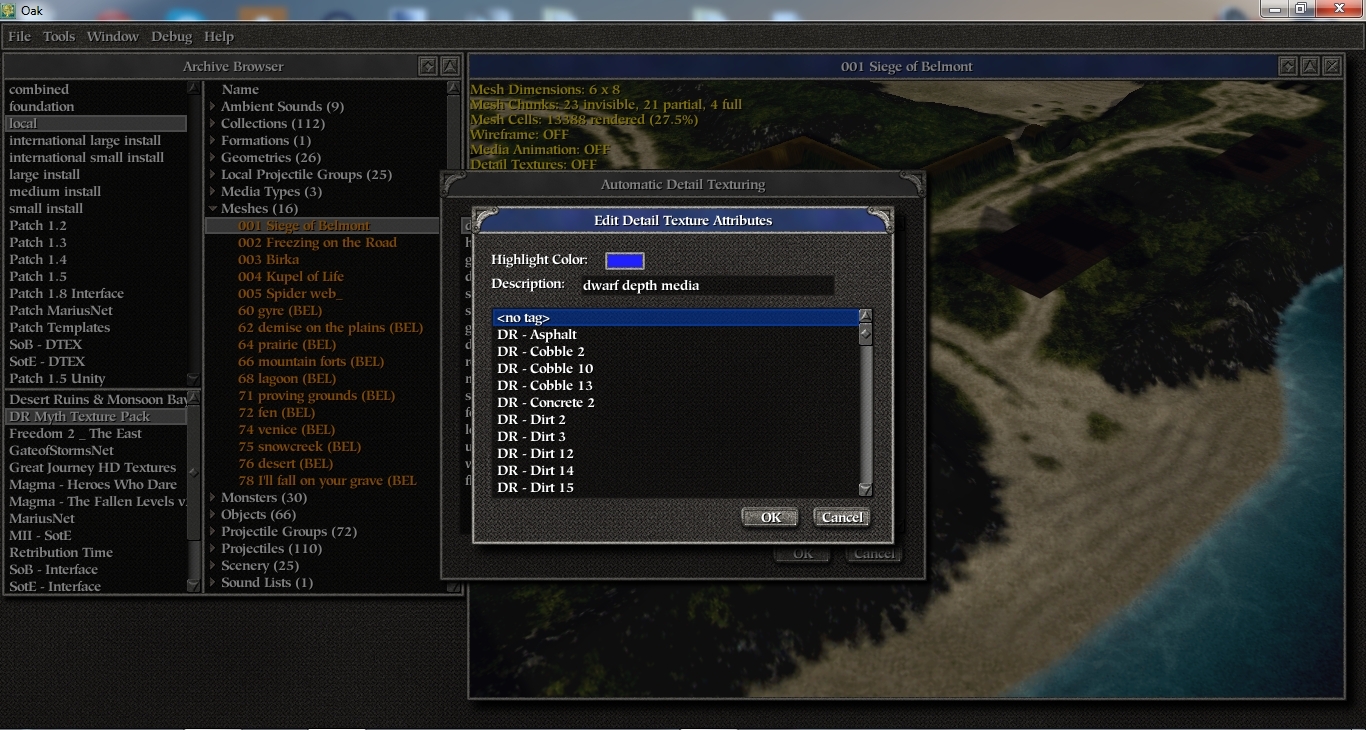
9. Select Terrain Type and select Textures for replace terrain.
Picture #9 Replace Terrain
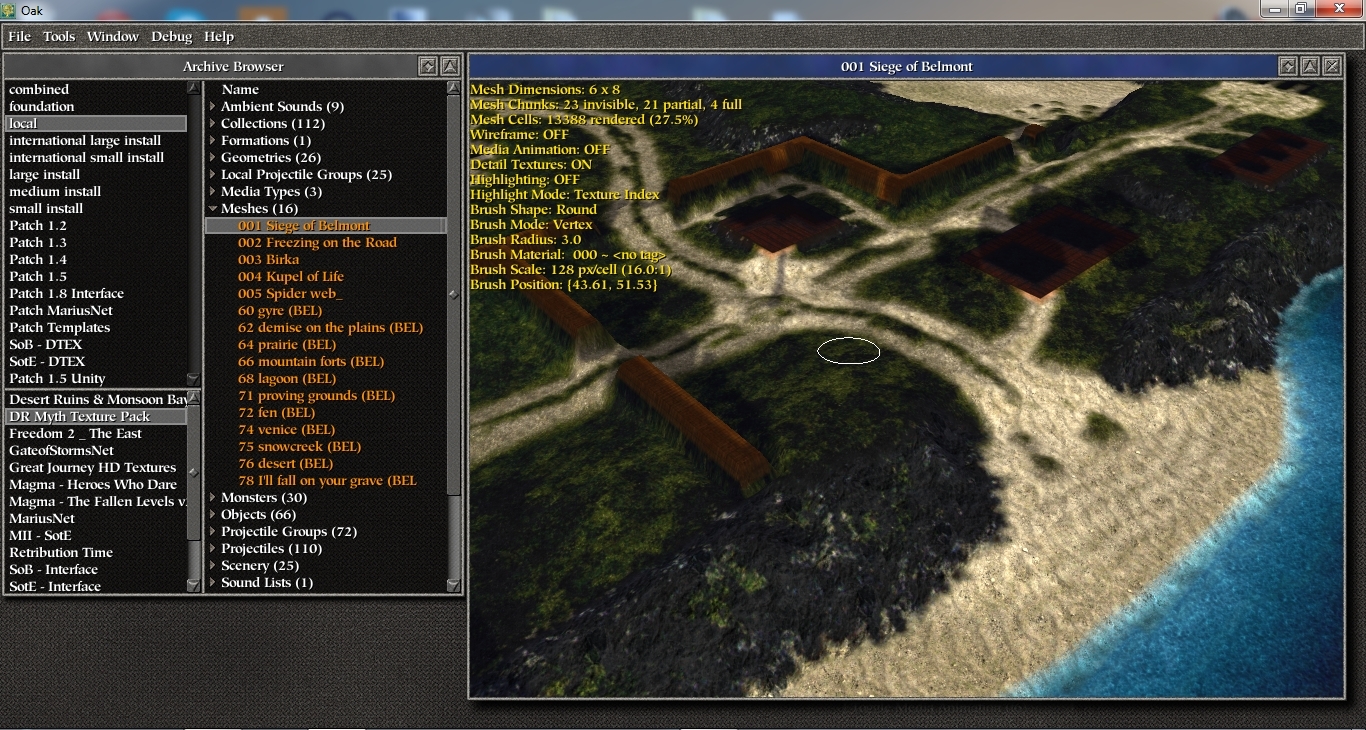
10. Then You end replace Textures, Select "OK" button.
Picture #10 Textures Ready
11. If don't like something textures you can use brush.
Picture #11 Brush
12. Click "TAB" button. You open textures table. Select textures and use brush to replace terrain. Use the wheel to adjust the brush size. Also, double click on the textures in the texture table - will give you chance to replace "Texture 1" - to "Texture 2".
Picture #12 Brush replacing
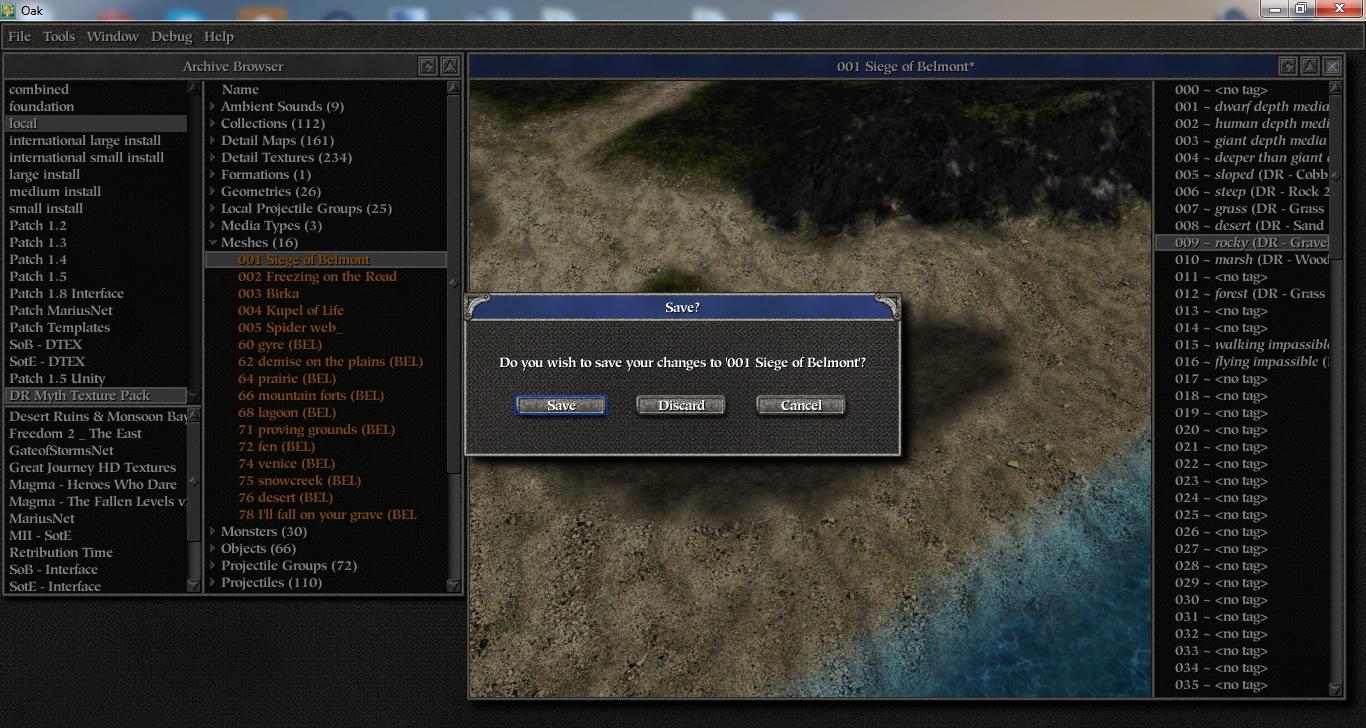
13. Don't forget SAVE your DTEX. Just close your Mesh window and select "SAVE".
Picture #13 Save DTEX
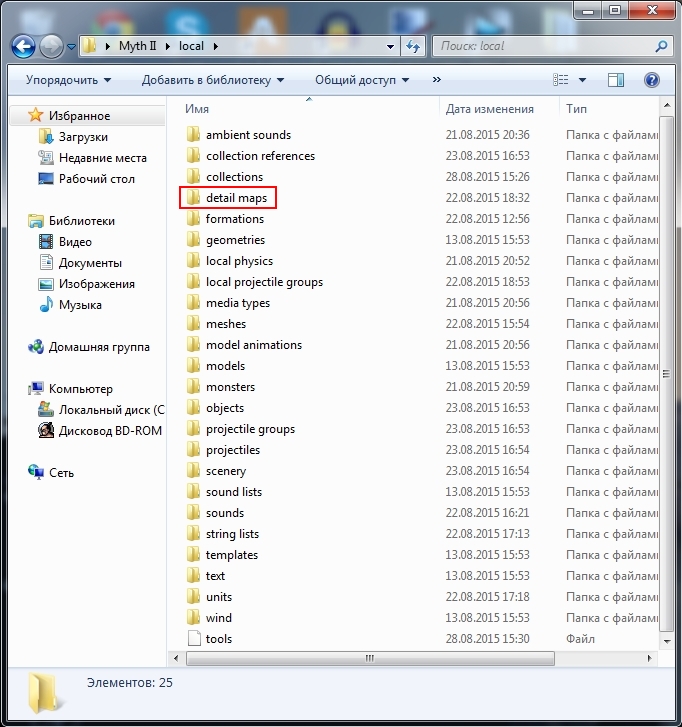
14. Your Detail maps stored in Myth II local folder.
Picture #14 Dtex maps
------------------------------------------------------------------
Re: (OAK- Detail Textures) new map creation
Posted: Sat Aug 29, 2015 10:11 am
by BambooStew22
Amazingly detailed explaination. Thank you paladin MAIK.
One more question. Who do I contact to try and get OAK????
Re: (OAK- Detail Textures) new map creation
Posted: Sat Aug 29, 2015 10:26 am
by paladin MAIK
BambooStew22, I send PM (Private Message) for You. Check your Tain mail.
Re: (OAK- Detail Textures) new map creation
Posted: Sat Jul 30, 2016 1:18 pm
by wonka
Anyone got a download link for OAK?
Re: (OAK- Detail Textures) new map creation
Posted: Sun Feb 12, 2017 4:41 pm
by Point
nice tutorial.